Quite a few cycle parts were absent on the bike “as received” – it had been “flat-tracked” and there’s not much need for a headlight or a front stand if you’re racing.
Headlight Brackets
I had already decided that I would use a headlight with an integral switch rather than having the switch in the tank panel and I bought most of the electrical system – the headlight, rear light, battery (a lead-acid gel unit) and dummy battery container etc from Paul Goff. However, there was no bracketry for the headlight. Luckily, Bonhams post high-res pictures of the bikes that they sell and leave them for all to see after the auction (if anyone from Bonhams ever reads my blog, then "Thank You" ....and please keep posting the detailed pictures - they are incredibly useful to restorers) and a pretty original barn find34/10 (the 1934 500cc model) was sold at the 2010 Spring Stafford sale. A couple of the pictures on Bonhams website show the headlight and bracketry in sufficient detail and helped me fabricate a replacement.

As I’m using a switched headlight I needed a little more space to move the headlight forward a bit and so a swan-neck lower part of the bracket was made

but, overall, it’s a pretty fair copy of the original

Front Stand
Up to this point, I still hadn’t finished the front mudguard fixings; in common with many bikes of the period the lower mudguard stay is a front wheel stand. Again, a picture of the same barn-find AJS 34/10 shows the detail.
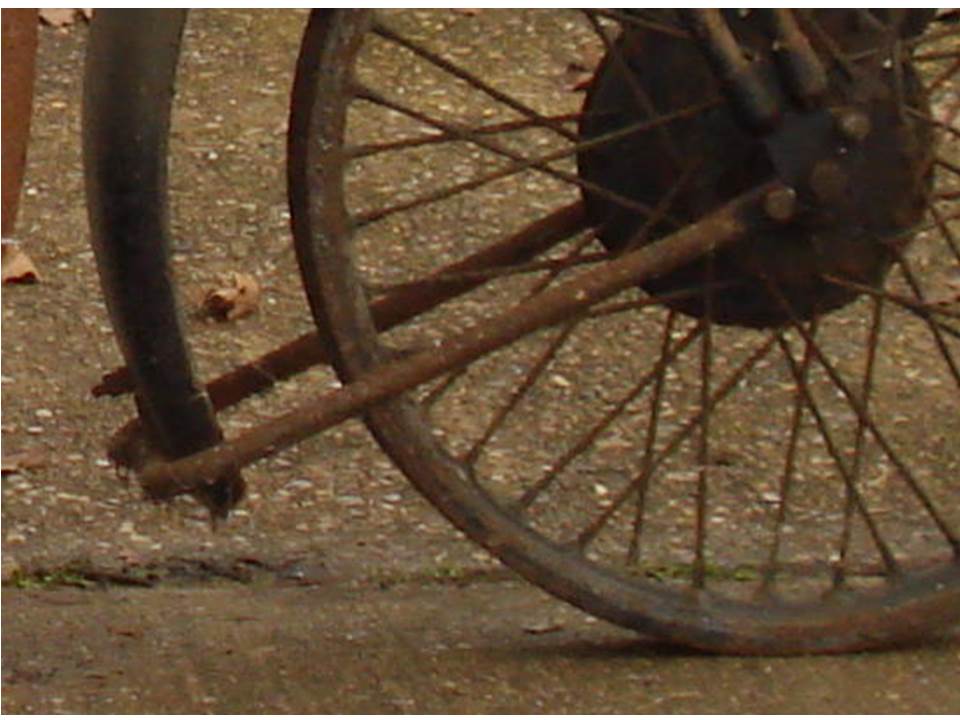
By scaling against the fork tubes, I estimated the diameter of the tubing used for the stand to be ~ 0.625”. Unfortunately, the maximum diameter that I can accommodate in my pipe bender is ½” and I also cannot bend the tight radius that is required. Luckily, there are plenty of these stands around and it didn’t take long to find one that could be modified to fit – it came from my buddy JT and so it was probably originally fitted to an Ariel.

After cutting:

and shutting:

it fits the AJS perfectly.

Repairing the Seat
The Dunlop seat that was fitted to the bike was in poor
condition. Whilst I appreciate patina, the rubber of the original covering was so hard that it would have probably disintegrated the first ride out.
_cropped.jpg)
_cropped.jpg)
but is period correct, as seen in the 1931 Dunlop brochure.

Picture courtesy of Velobanjogent
Luckily, high quality reproduction rubber covers are being made and so I decided to refurbish the seat myself. The 3 main metal parts of the seat were grit blasted and then painted
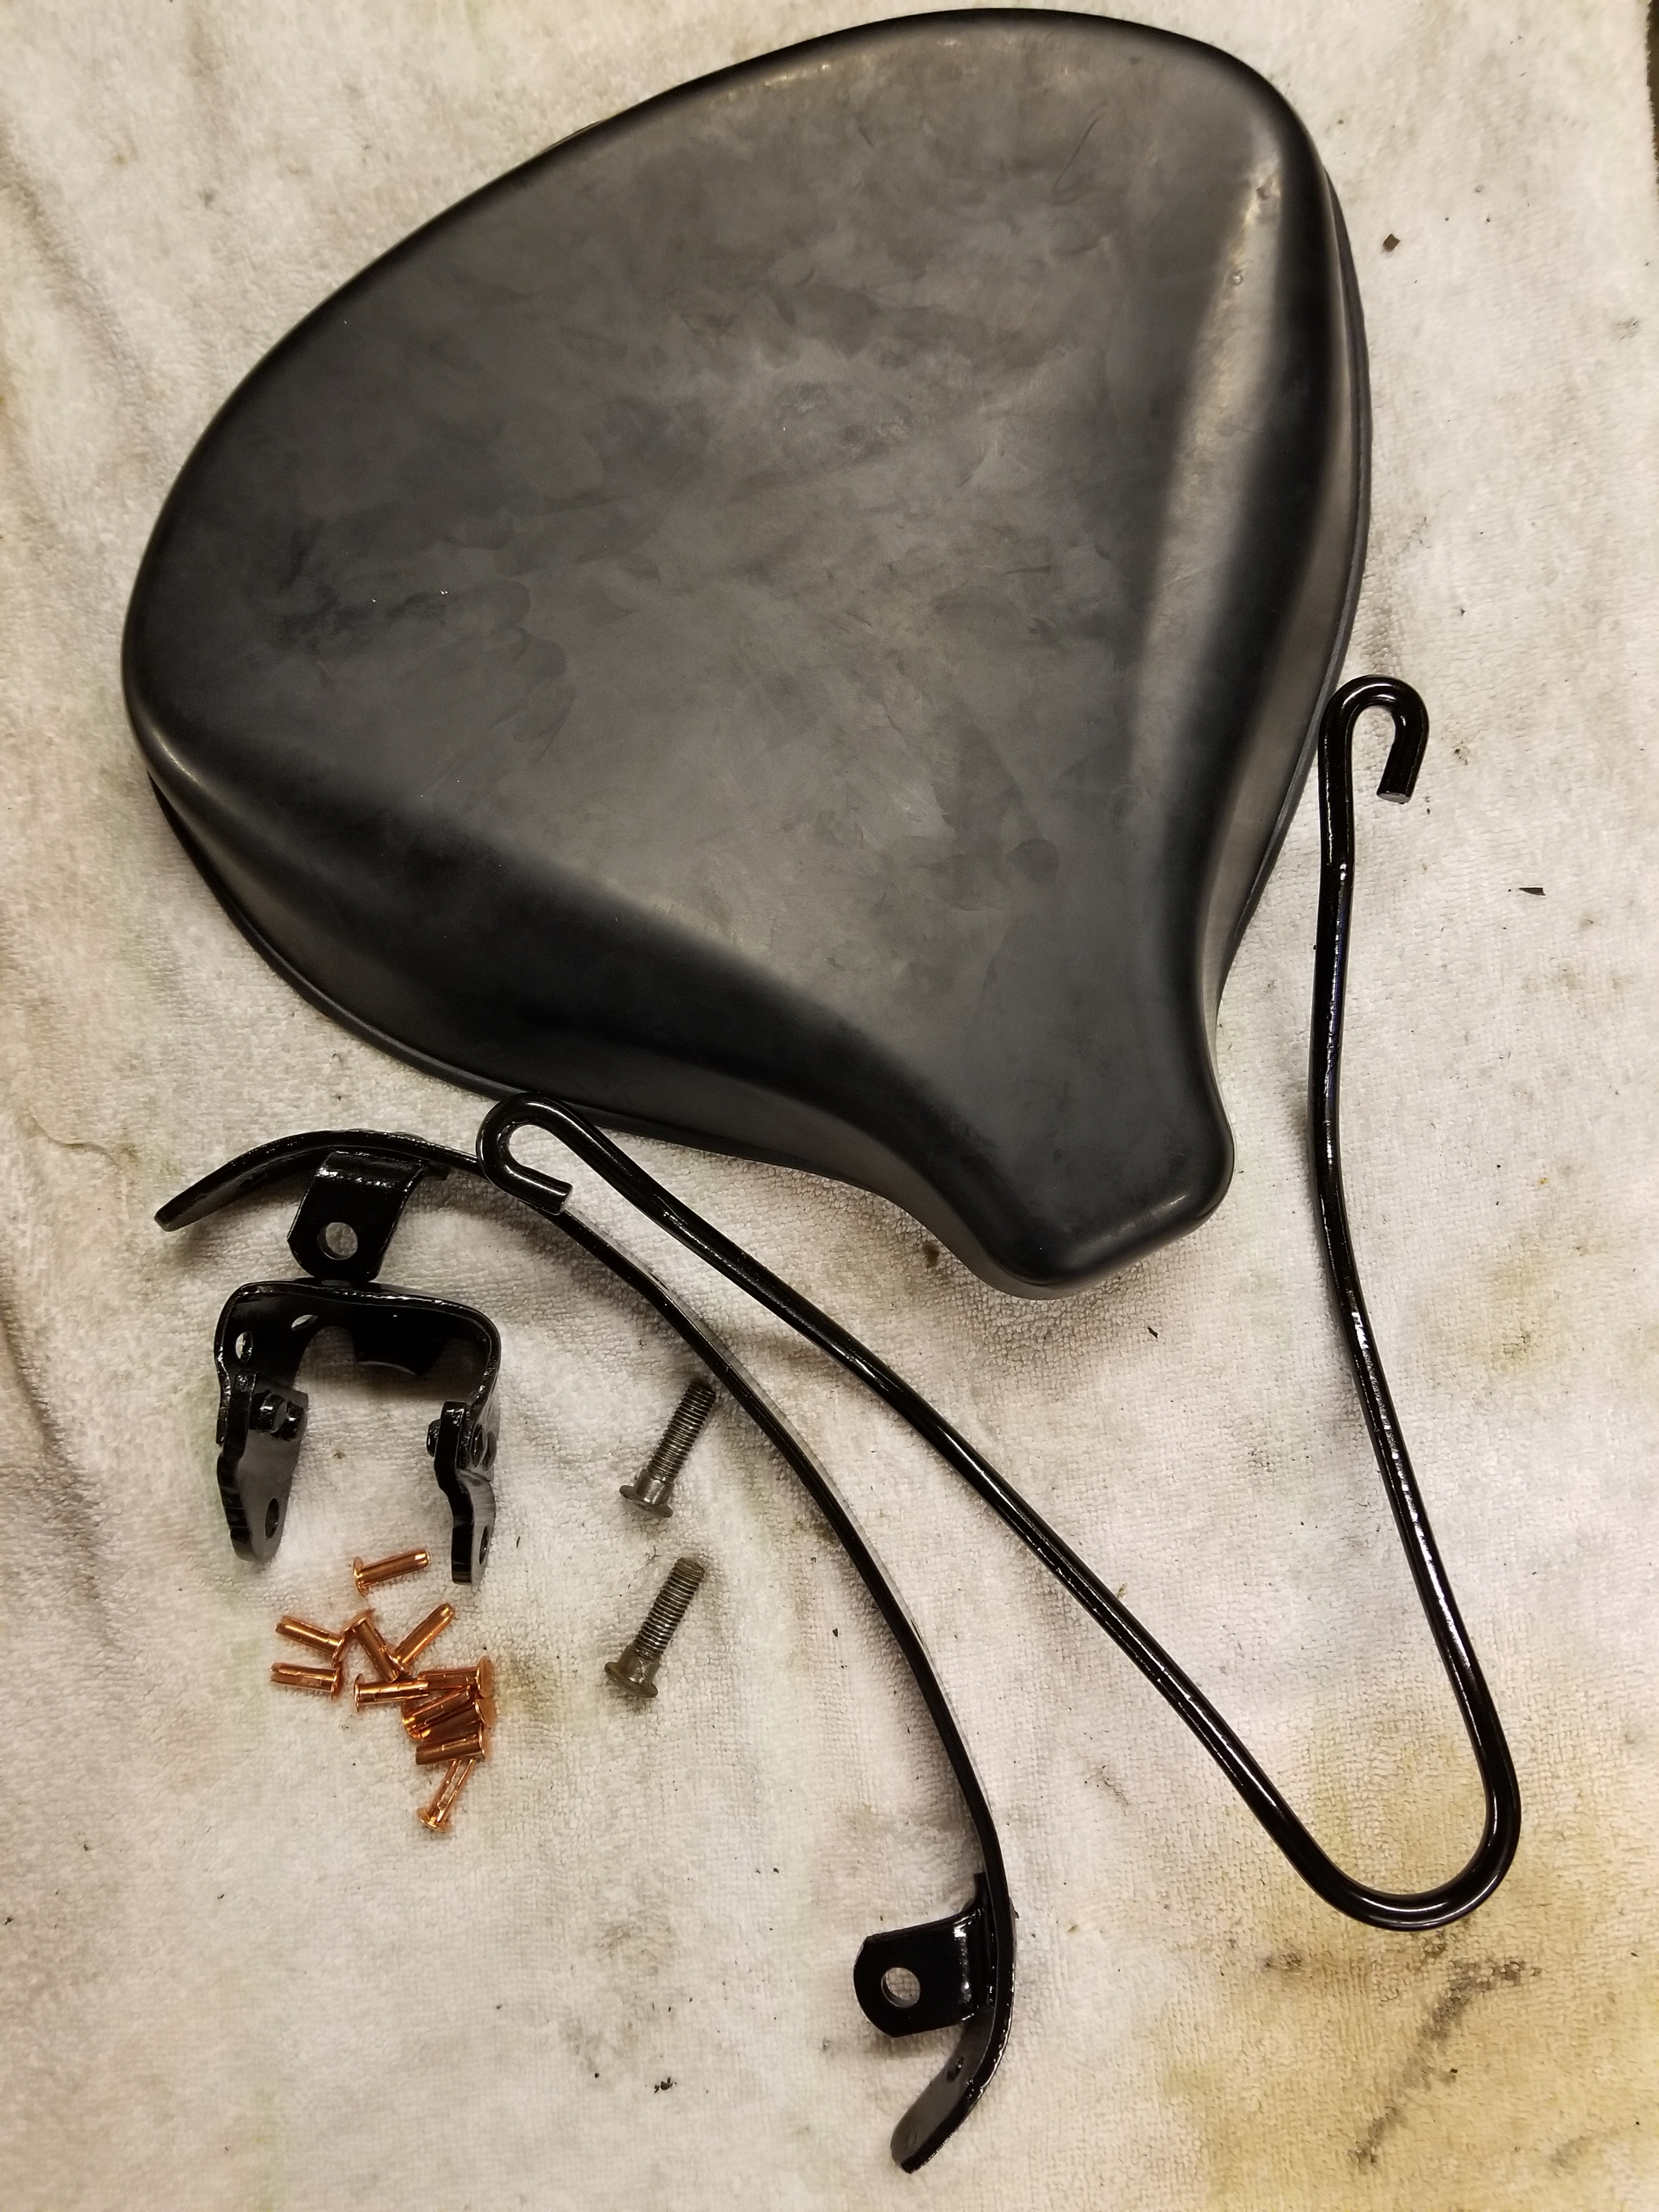

and the rubber cover carefully drilled and re-riveted.


The “Dunlop” plate was removed from the old cover and affixed to the new one.

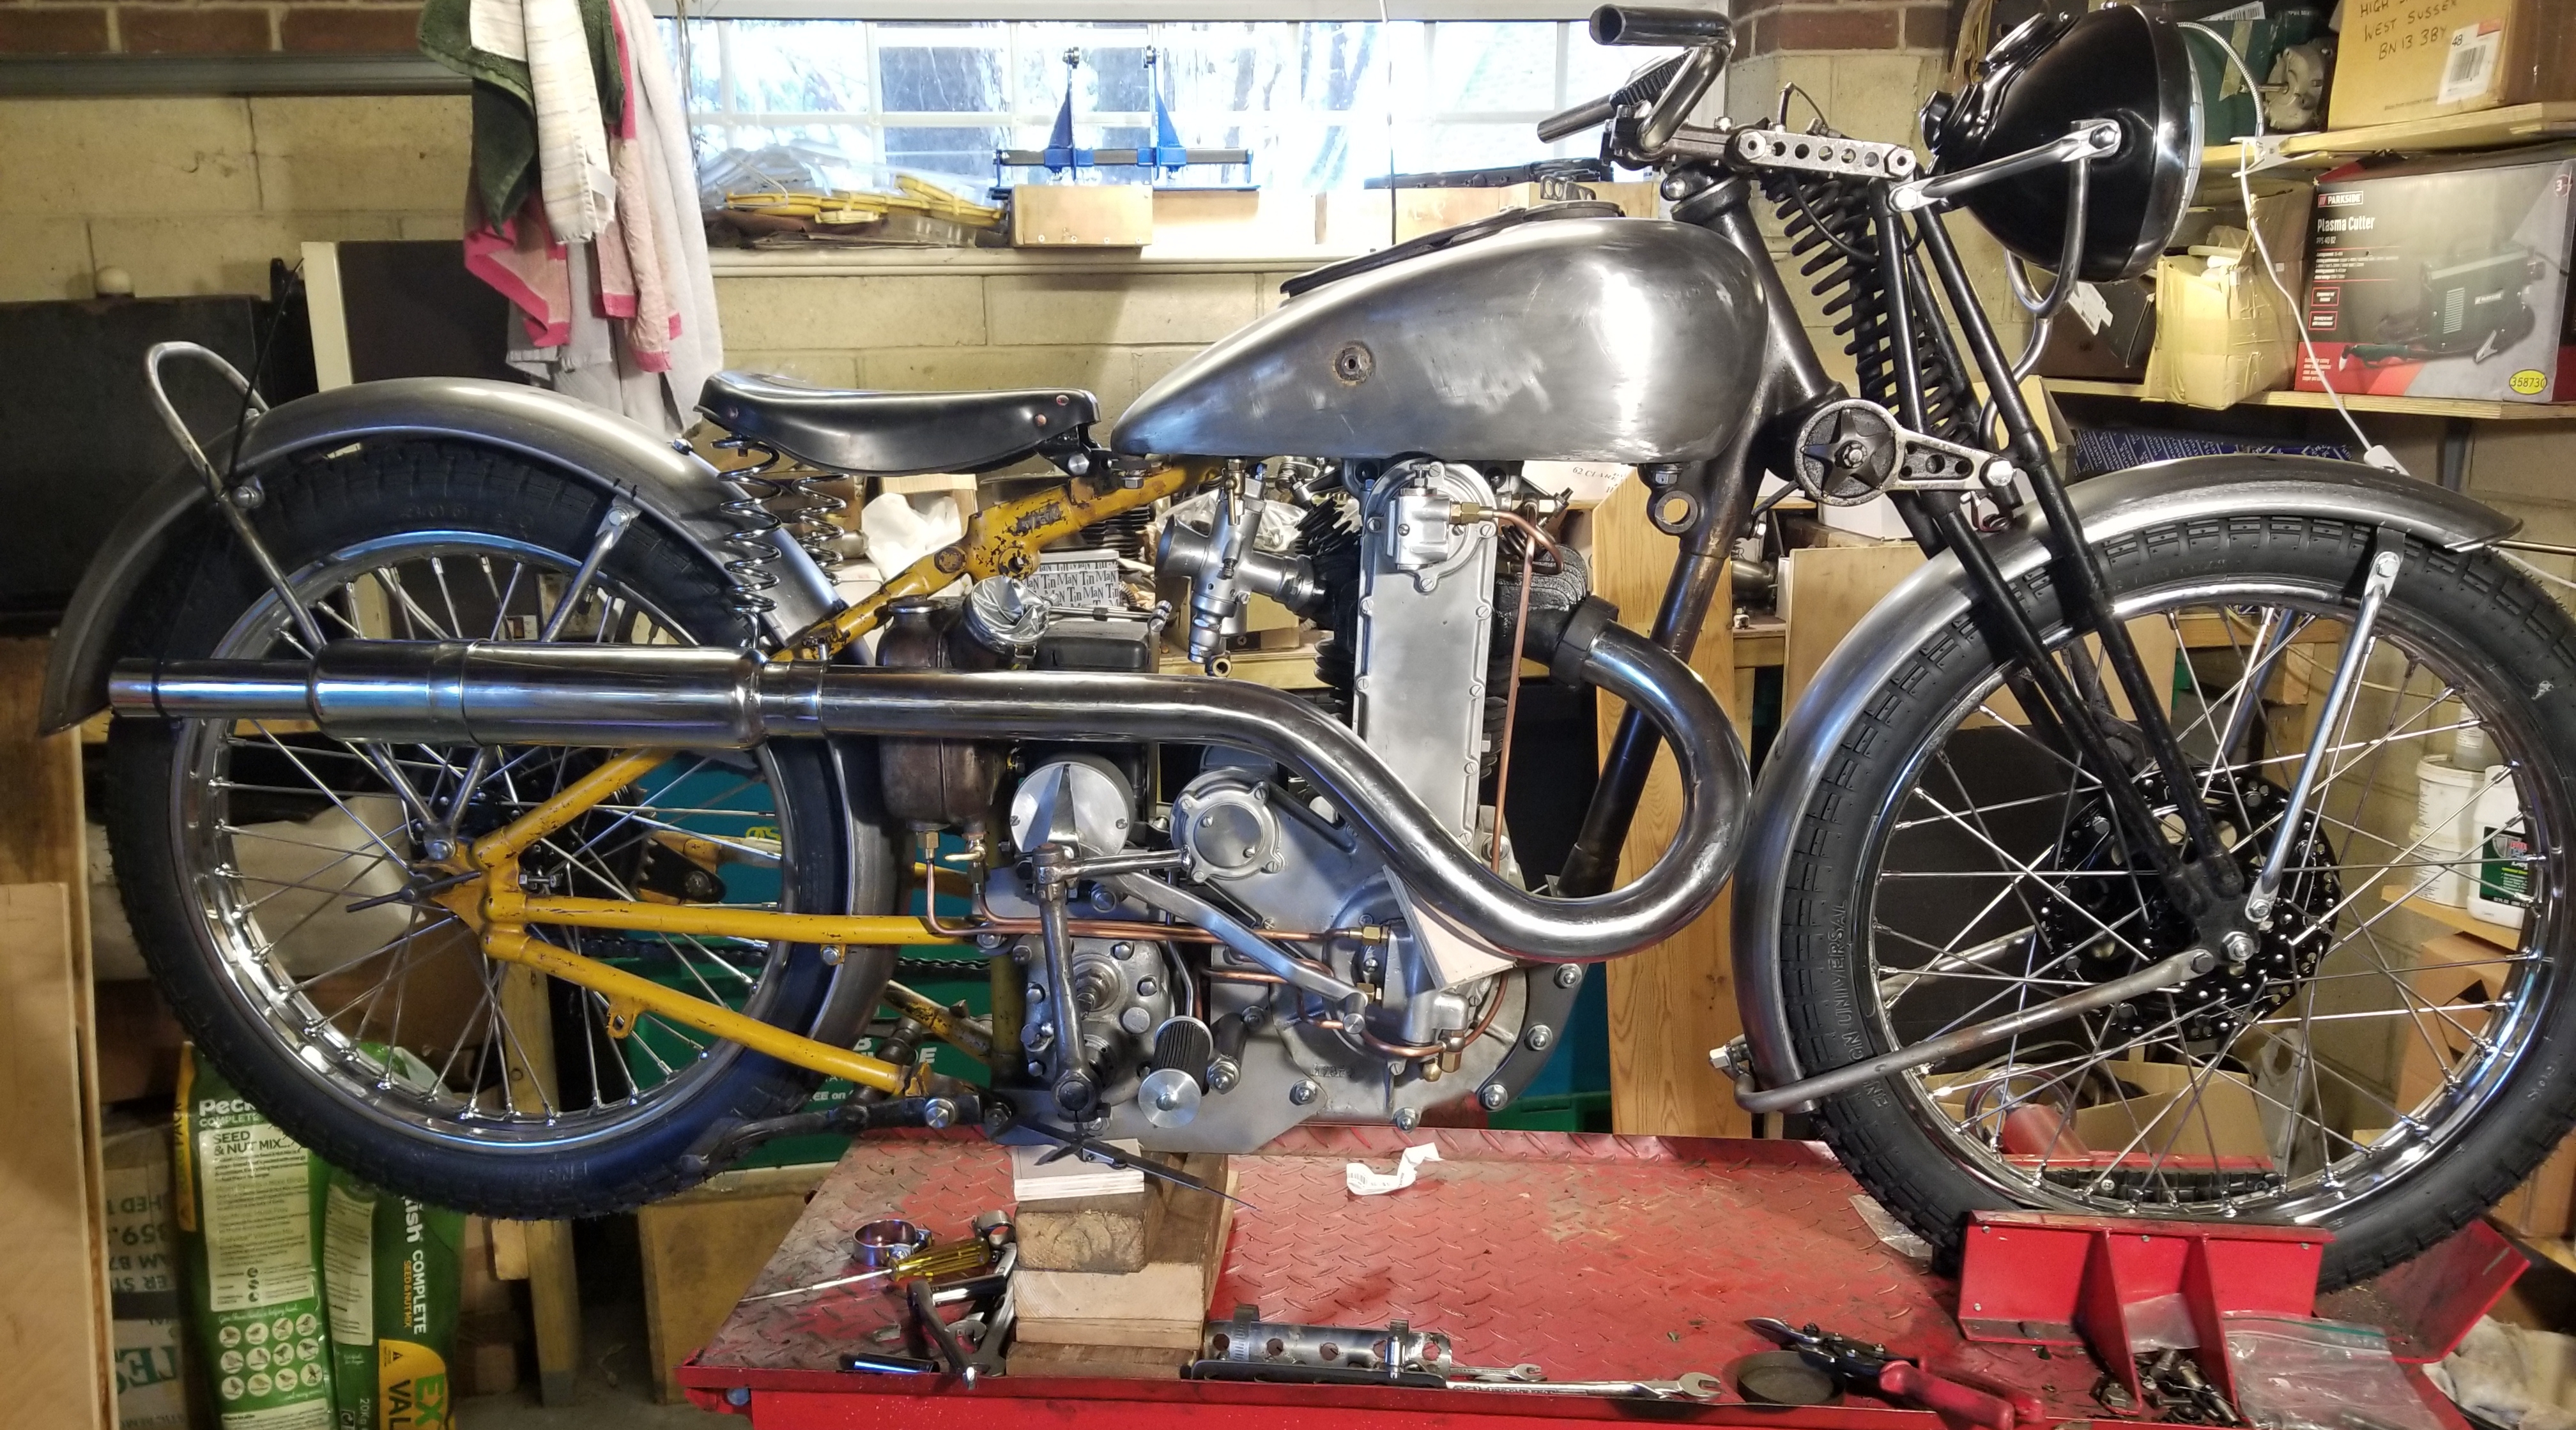
With the front mudguard and headlight fittings completed, the refurbished Dunlop saddle and the exhaust temporarily fitted prior to making the brackets the bike is starting to look like a proper 1930s off-roader.