
As I mentioned in my last blog post, I like to get the wheel building underway as a priority when starting a new project.
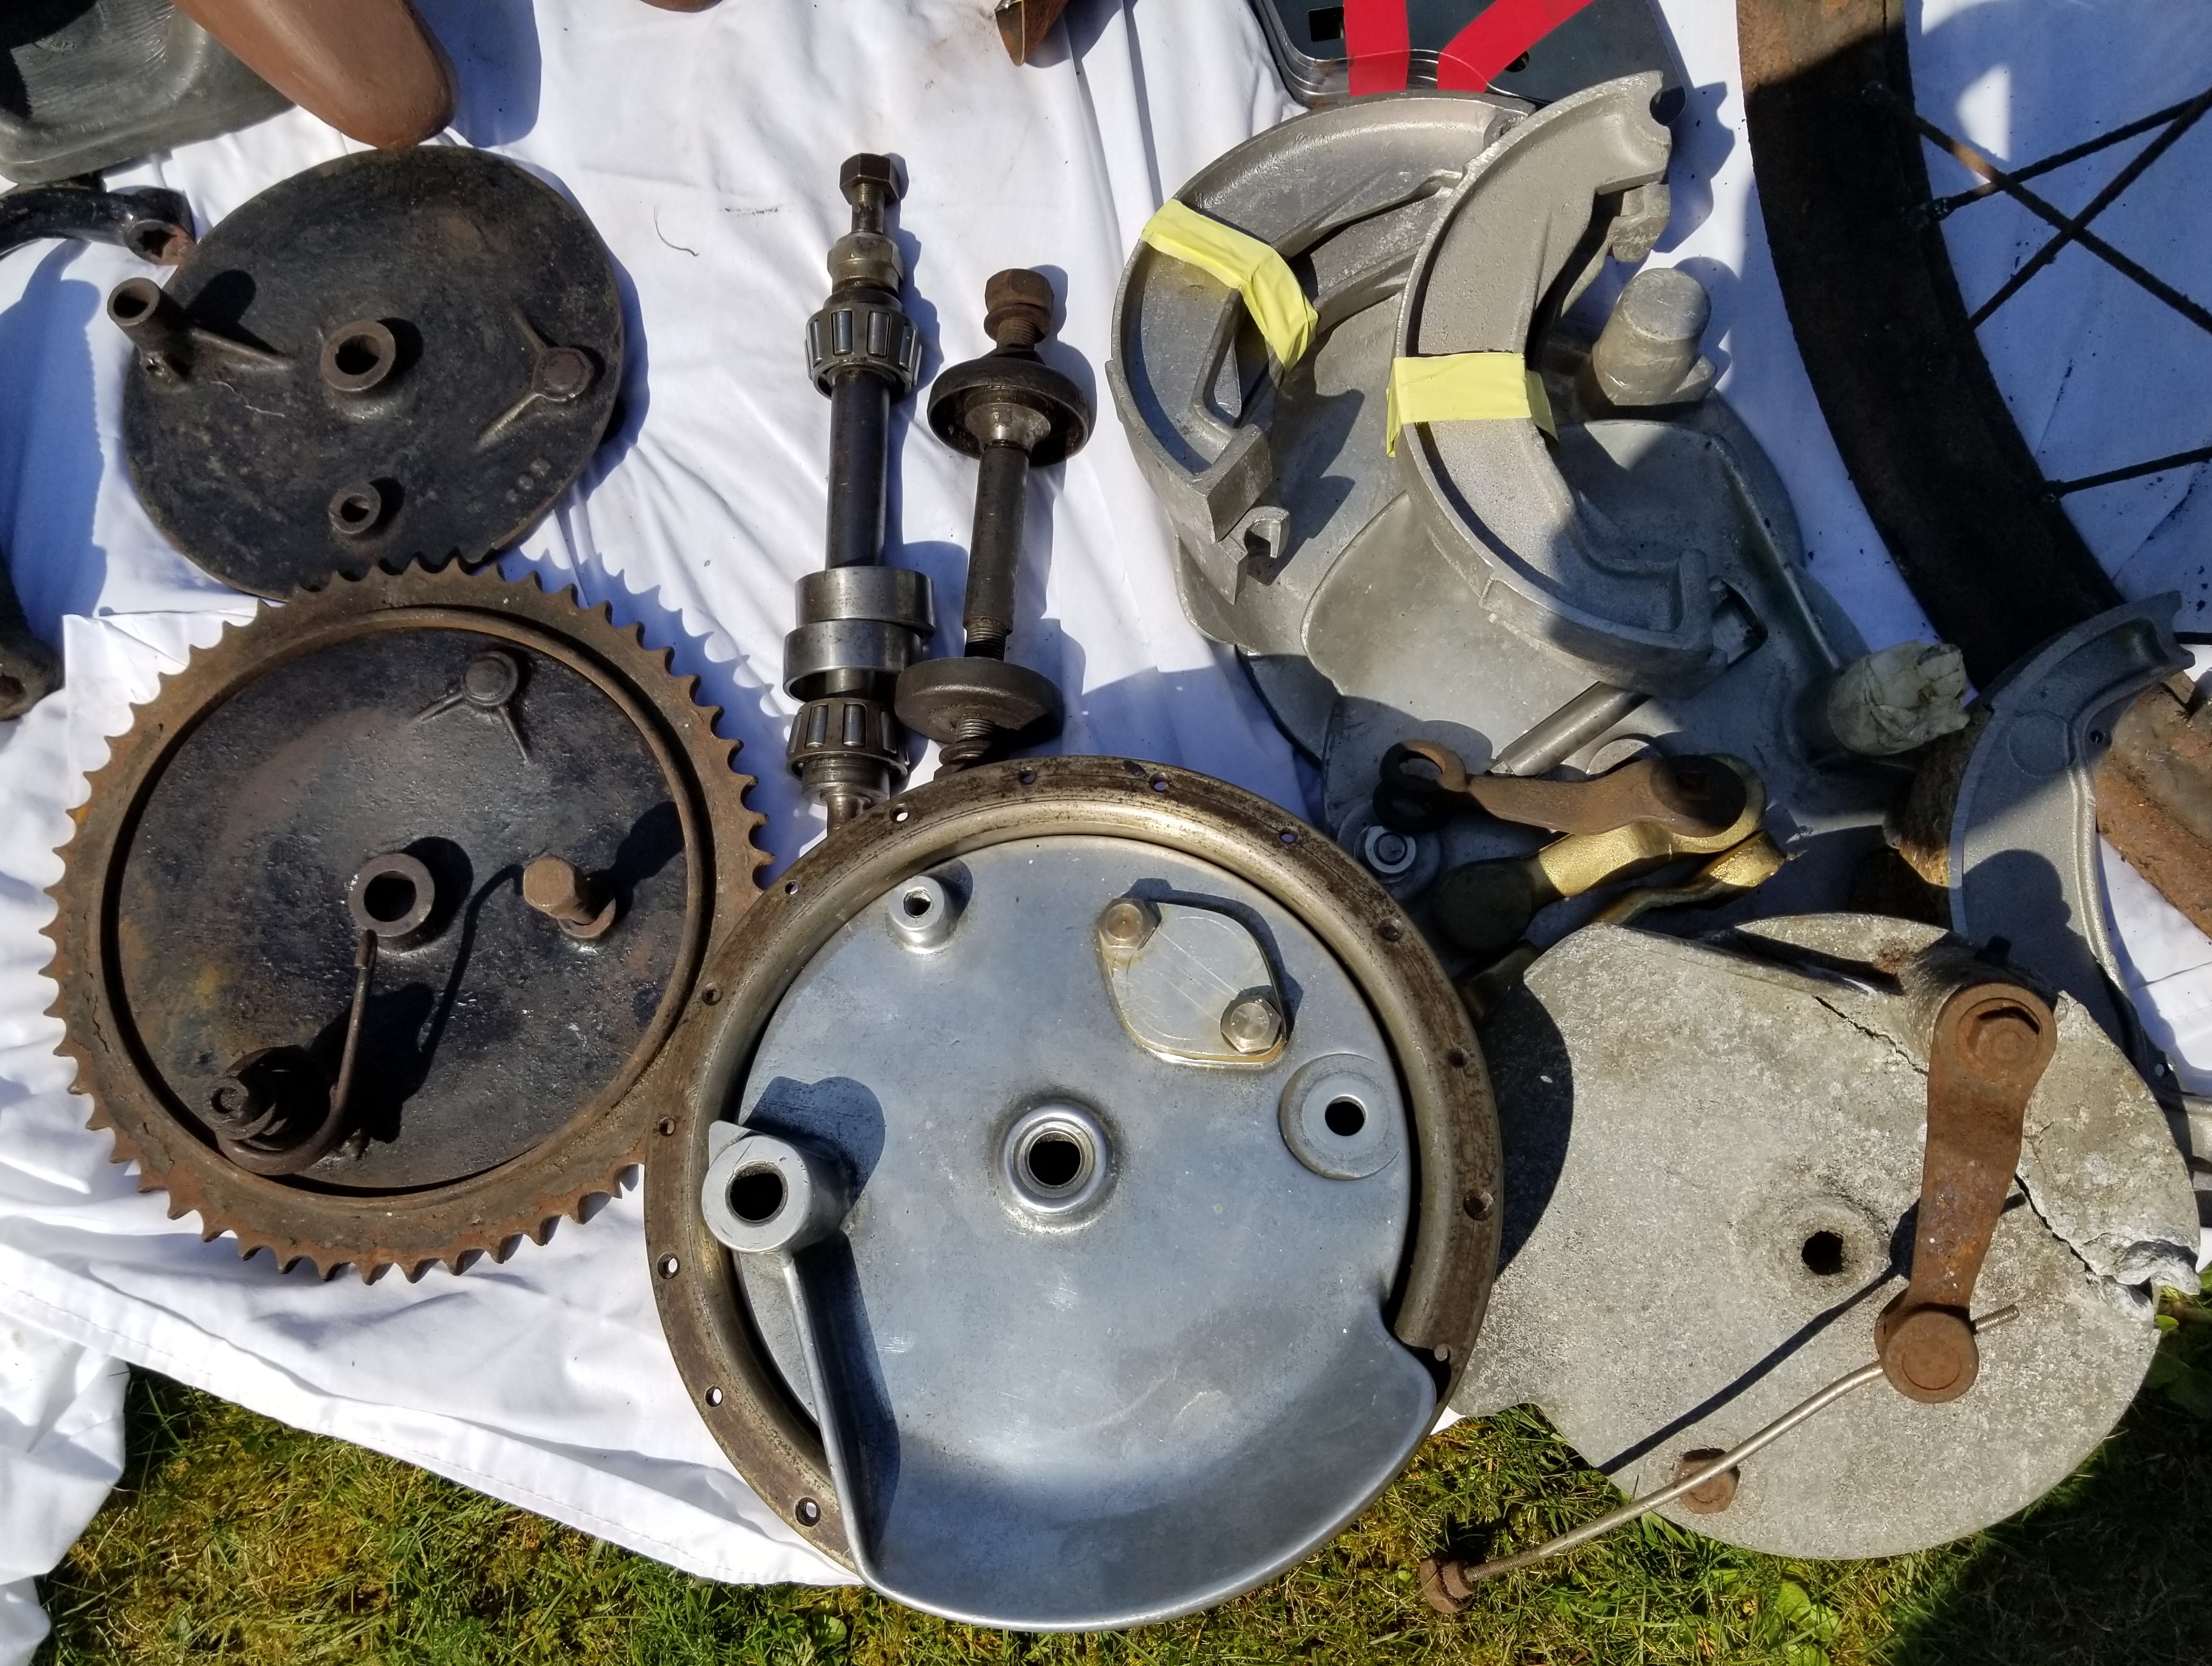
The starting point was this collection of bits

The later KTT 305 has different hubs from the earlier KTT 55 and I will talk about those later.
In total, there are 6 wheels to be built/rebuilt – 2x KTTs plus the KTP-framed special.
The first step was to send off the loose parts for grit blasting to be able to assess their condition and to then sort out each of the component parts – hubs, brake plates/shoes and bearings.
Front Hubs
There are 2 parts to the early front hubs: the “Front Hub Shell” (as it is referred to in the parts manual, part # W 1/2)

and the bolt-on brake drum (part # W 2)

All of these were in good condition although the inner diameter for the bearing cups on one of the front hub shells was oval and tapered – more of this in a later blog post. In anticipation of these projects and knowing that I needed one more front hub, I managed to buy one of these (hub + drum + brake plate) on eBay early last year; these items are hard to find and do not come cheap – I paid 400 GBP!
Rear Hubs
The rear hub assembly also consists of 2 parts: the Rear Hub Shell (part # KS 7/4) and the brake drum and chainwheel (part # KS 2/3). The parts that came with KTT 55 were in excellent condition (note that the superficial surface oxidation appears very soon after grit blasting and can be easily removed)

However, I was missing a rear wheel hub assembly for the KTP-framed special. Luckily, GroveClassics has had the drum/sprocket (KS 2/3) remanufactured and I immediately bought one of these (parts such as this are generally remanufactured in batches and when they have all been sold there could be a considerable wait until their reappear)

but I am missing a rear hub shell – KS 7/4. I have put an advert in Fishtail, the Velo Owners Club magazine, in the hope that somebody has one spare - this is a better picture of KS 7/4.

If I can't find one then I will have to make one; it’s a fairly straightforward part to make but it needs a fairly large piece of steel and will probably take around 3 days to machine.
Brake Plates
The brake plate that came with KTT 55 has definitely seen better days!

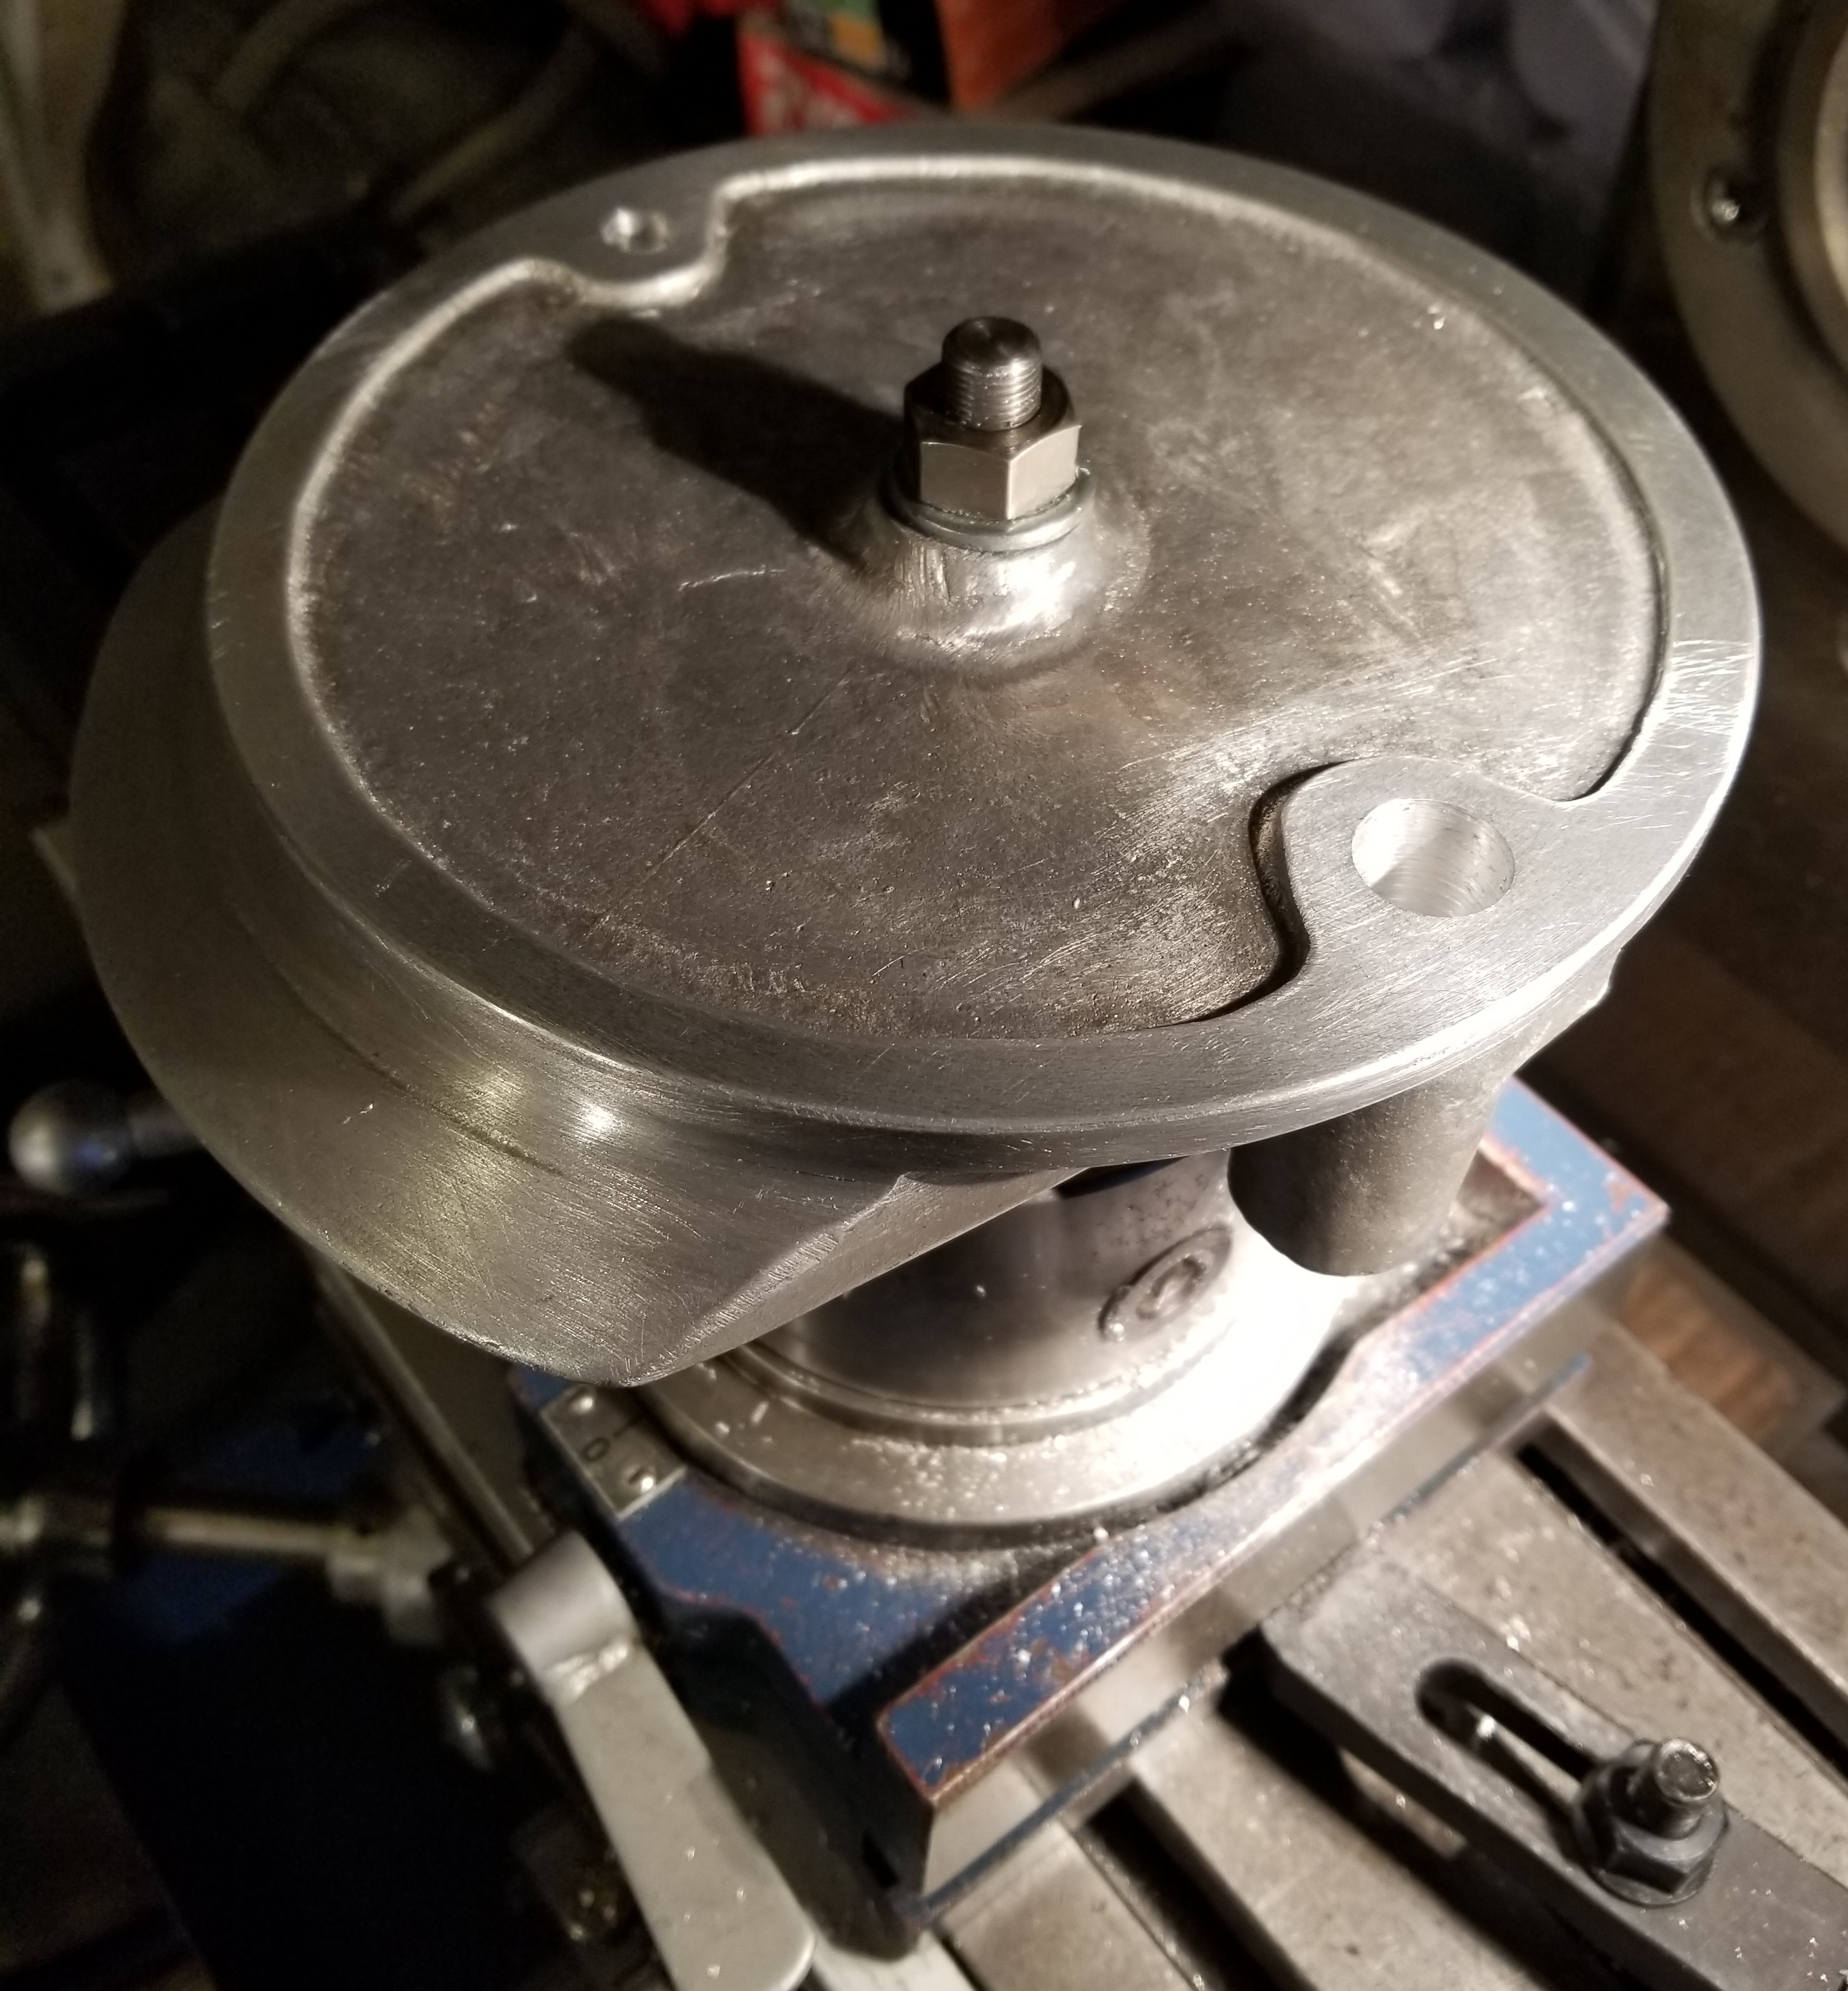
Luckily, I acquired an unmachined LM 25 aluminium casting for a KTT brake plate some years ago and so it was time to reverse engineer an existing brake plate and start machining. First, a ½” diameter hole (for the wheel spindle) was bored in the centre and a mandrel made for mounting the casting in the lathe.

The internal surface was faced-off and the outer diameter machined to size to fit the brake drum.

The brake plate was then mounted onto the rotary table on the milling machine to bore the holes for the brake shoe pivot (0.375”) and the brake operating cam (0.625” – to allow for a 1/16” wall thickness bush).
It is important to note that the centres of the brake pivot and cam are NOT equidistant from the centre. I don’t have drawings for these parts and so reverse engineered existing components – I do have a number of original front and rear brake plates – all indicate the following dimensions:

A new brake cam was made from EN8 steel

and, finally, a phosphor-bronze bush was made for the cam spindle

which was then pressed in and reamed to size, the spindle boss was drilled and tapped ¼” BSF for the grease nipple and the brake anchor boss drilled and tapped 3/8” BSW to complete the machining of the brake plate itself.

Brake Shoes
I had 2 pairs of unmachined brake shoes and these were set up, in turn, on the milling machine to machine numerous surfaces. After a days work I had 2 new sets of brake shoes ready to send away for linings.

A New Motor for my Lathe – an unplanned project!
I had just started machining brake parts when all the electrical circuit safety trips were thrown in my workshop when I switched on the lathe. After a few checks I discovered that the motor, which I estimate to be at least 50 years old, was the cause and therefore needed replacing. I also found that the electrical switchgear was probably of a similar age and the solenoids and wiring was like spaghetti inside the body of the lathe.

I fitted a new motor (Imperial sized motors are still made – although these are no longer made in the UK but in India)

and modern and much simplified switchgear.

So I’m now back up and running again but I lost 2 weeks on the KTT projects!
No comments:
Post a Comment