Sunday, 20 September 2026

WELCOME to my blog about restoring vintage overhead camshaft AJS and Velocette motorcycles

 Apologies to anyone that has come to this page expecting to see exclusively vintage AJS motorcycles .....scroll down the page a bit and you will find plenty of them.

However, I sent all of my cammy AJSs to Bonhams last year and they were sold at the Autumn Stafford Sale

The URL of "vintageajs" for this blog is now somewhat misleading but it's too late to change it and there is still plenty to read about the AJAY projects. If you happen to be the new owner of one of the bikes that I recently sold then there is plenty here to read about its build. I still have 2 early Big Ports waiting in the wings ....but they will have to wait until I've completed the Velos. 

In 2023 I started the restoration of 2 early Velocette KTTs plus another Mk 1 OHC cammy special - a few details about each of these bikes can be found here and here

A lot of work has been done on these bikes over the past 3 years and the INDEX PAGE provides links in chronological order of these projects so far.

In August last year I acquired a DOHC 250 Velo Engine. I have completed the rebuild of this engine and the dry build of this bike is also finished. Details of this project can be found in the links in the INDEX page.

I also acquired the engine, exhaust pipe and petrol tank of KTT 581 early last year. This bike has an interesting and somewhat sad history. I have rebuilt the engine and plan to put this in a bike when I have completed the existing 3 Velos - full details of the project so far in the links here.

I have completed the final builds of KTT 305 and the DOHC 250 Velo and have just received the powder coated bits and pieces to be able to complete KTT 55. That shouldn't take too long but, in the meantime, a reader of my blog reminded me of a bike that I restored many years ago, a Matchless G80CS, this one.


 I put a few more details of this bike plus others in this link.

During the last 5 years I have posted quite a lot of information and to aid navigation the "Labels" section on the right side of this page lists the various projects.

The labels marked "INDEX" give a link to a page that provides a complete list and links to all of the separate sub-projects related to that main project.

Alternatively, scroll down this page and see what's here.

When I started this blog I owned a 500cc AJS R10
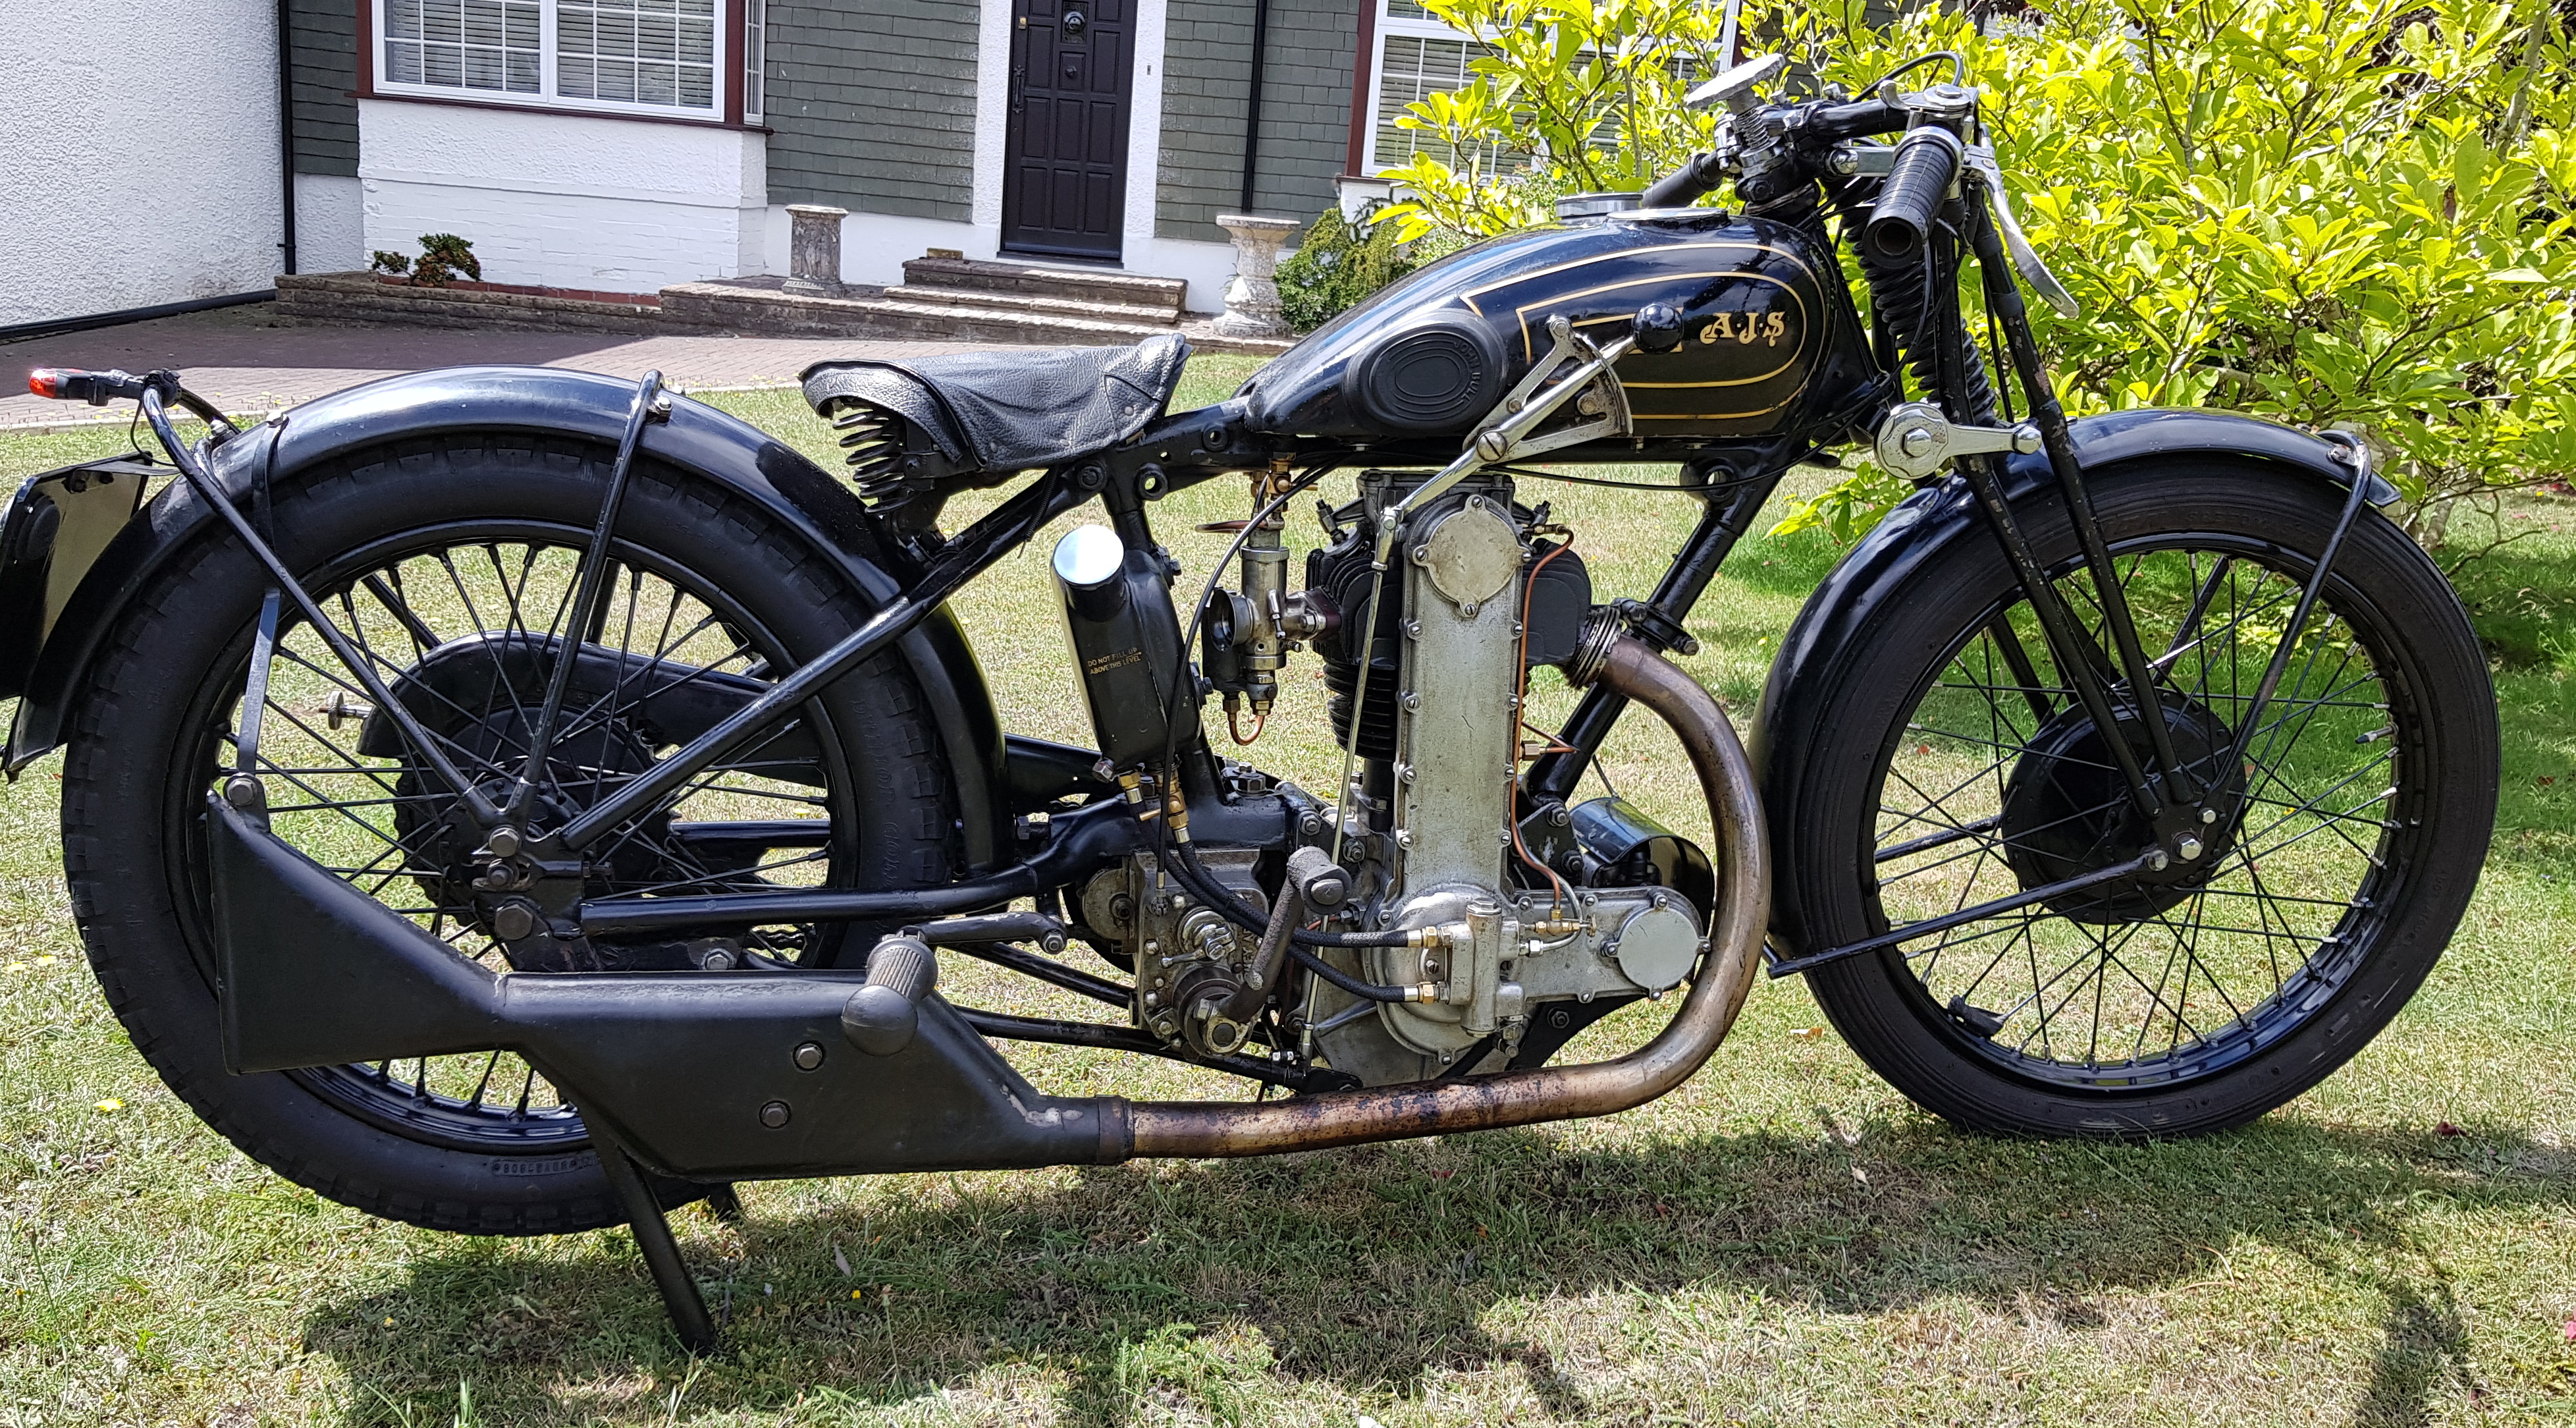

that I've been riding for many years and wanted an early 350cc bike. I bought one at a Bonhams auction; this is what I brought home....

....a bit of work was needed to bring it back to life 

Full details of the restoration can be found here.

During the restoration of the K7 I figured that I could put an early overhead camshaft Velocette cylinder, cylinder head and cambox onto the crankcases of an AJS 350cc engine from 1931, convert it to chain-driven OHC and make an engine that looks like a K7 but has a Velocette top-end. I had a 1928 350cc AJS sidevalve that I had bought on eBay and used that to create the AJcette ....giving credit to both manufacturers.

It looks pretty similar to the K7 and to demonstrate that there really are 2 bikes, here they are both together.


Details of the AJcette project can be found here.

I have quite a lot of early Mk1 OHC Velocette parts and after completing the AJcette I decided to use some of these to make a replica of a one-off bike that AJS built in 1929/1930 for an attempt on the world speed record. The original is a huge V-Twin beast that started out with a naturally-aspirated engine but, having failed to gain the record, was supercharged ...and again failed. The bike ended up in Tasmania for many years and, after being repatriated to the UK and restored, it is now in the National Motorcycle Museum.

This is what the original looked like:

and this is my recreation.


Like the AJcette, the V-Twin uses Mk 1 OHC Velocette cylinder components. The full story of how this bike was built can be found in the links here.

There is also a 14 minute edited YouTube summary of how these bikes came about here and a longer unedited version here

This bike is now in the Sammy Miller Museum.


In January 2022 I started the restoration of a 1933 AJS Trophy Model

and this was completed in March 2023.


The Index Page for this project can be found here.

I also reported briefly on a couple of my other projects ....vintage OHV Nortons


 and putting a Marshall supercharger onto my 1934 MG PA


I hope you find something of interest.

Final Build and First Start of KTT 55

Apologies if my blog is starting to look somewhat repetitious but it’s difficult to avoid a certain amount of repetition when building 3 very similar bikes simultaneously.

This was the last one, KTT 55, that I have just completed


and this is the trio of (from rear to front) KTT 305, the DOHC 250 and KTT 55 assembled in the back garden for the first time.

The procedure for the last one has followed exactly the same format as the previous builds, namely strip the dry-build bike, sort into boxes for “no further work required”, “plating”, “chemical blacking”, “powder coating” and “painting”. When building this 3rd bike the phrase “…same procedure as last year” came to mind. If you live in continental Europe this will probably mean something to you; if not, check out this link for an explanation and this link for the movie.

There were not many parts for plating

or chemical blacking


but, as with the other bikes, the petrol tank takes by far the most time and effort.

After stripping back the protective red oxide paint to reveal bare metal, the tank was sprayed with etch primer

followed by 2 good coats of 2k high-build primer

which, after leaving for a couple days, was flatted off prior to applying 3 coats of 2k gloss black (these are all applied during the same session as soon as the previous coat has flashed off)

which was then flatted with G3 rubbing compound and masked for pinstriping prior to carefully applying 5 coats of 2k gold paint (one side at a time) with a small brush. Finally, the pin-striping was blended in with G3 compound, the “Velocette” waterslide transfer slid into place and 3 coats of 2k lacquer applied.

Although it takes quite a bit of effort the end result is quite satisfying.

It has been a long journey for these tanks. Mr Sridhar, pictured below with me outside his workshop in the back streets of Bangalore many years ago

made these plus some other tanks (I wrote a few lines about this in a previous blog post some years ago). These are some pictures of the 3 tanks that I have used on the 3 recent Velo builds during their construction.


Works of art and fabricated with only a few simple hand tools.

Mr Sridhar: I have no idea if you are still working in Bangalore or if you have gone back to your home and family in Kerala. But if you or someone that knows you ever reads this then please accept my thanks again for the most beautifully crafted tanks.

In the meantime, the powder coated parts came back and after a few days the final build of KTT 55 was completed and it was time to fire it up. Starting a bike for the first time after a complete restoration is always a slightly nervous moment, especially when it has taken so much work.

Just to recall a few details about the engine build – most of the parts inside the engine are new: a complete new crankshaft and con-rod, lower bevel gears, crankshaft shock absorber assembly, piston and rings running in a Nikasil bore, new-manufactured O1 tool steel Oldham couplings, valves, guides, springs, collets, rocker skids, tappet adjusters, reground cam, new-manufactured cambox scavenge oil pump, all bearings, all fasteners, rebuilt AMAC TT carburettor and square ML magneto - in fact, apart from the castings, it is essentially a new engine inside.

Before firing up the bike I put in on the starting rollers with the spark plug out and motored the engine for a minute or so to get the oil circulating. The spark plug was then reinserted and with my wife as camera operator and my buddy JT helping with things mechanical it was time for the first start.


Not too bad. A bit of oil where the tappets exit the cambox (I had filled the cambox with oil during assembly) but otherwise oiltight and sounding crisp (or simply “loud” if you’re a neighbour).

The final step, for now, was to set the oil pressure. I have a 0 - 30 psi pressure gauge that I acquired many years ago to set up the oil pressure on a KTS and that is attached to a length of hose and a K99 Inspection Plug that screws into the upper bevel gear housing, modified with a 1/8” BSP internal thread, to measure and set up (using the K69/2 adjuster) 12 psi oil pressure. I cable tie it temporarily to the handlebars for convenience. The oil return to the tank was of course checked and was good.

So, that’s about it until road testing starts. KTT 305 is now being prepared for a first start.